
VeneersLaminate
We complete a natural smile by considering the shape and color of teeth.
No-prep·minimal-prep Veneers
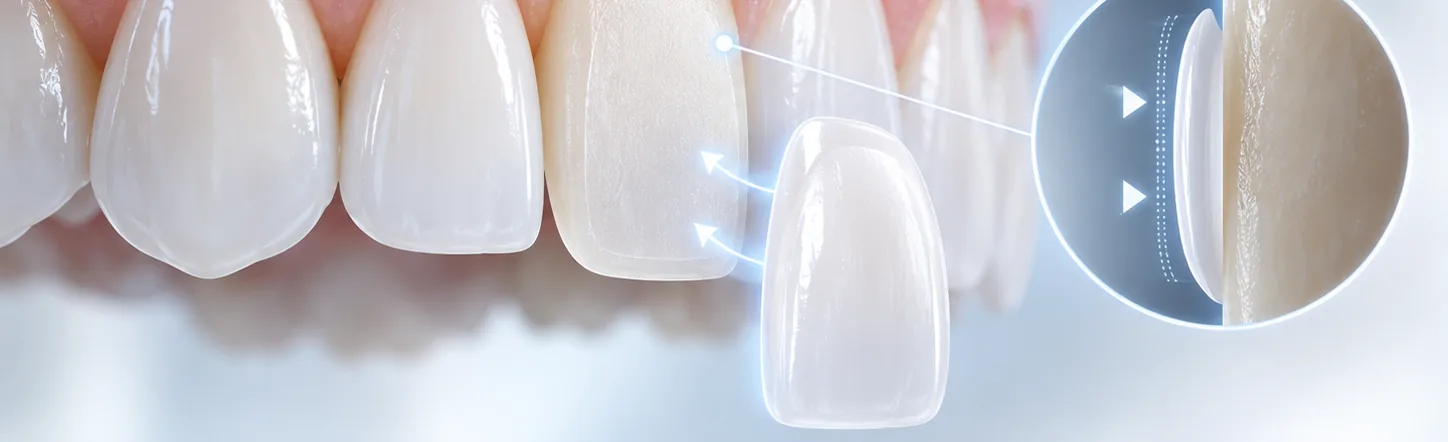
New York Yonsei Dental Clinic assesses the condition and shape of the teeth, and when possible plans no‑preparation veneers.
If the front teeth are spaced apart or small, or if part of a tooth is broken, treatment may proceed without removal depending on the tooth condition.
Even when tooth removal is required, we limit the reduction to only the necessary range of approximately 0.1–0.3 mm.
Treatment Candidates

If the tooth color is not satisfactory
If achieving the desired shade is difficult with Teeth Whitening alone

When tooth size or shape is irregular
When the size of the front teeth is small or the shape is uneven

When there are gaps between teeth
If you want to naturally improve the gap between front teeth
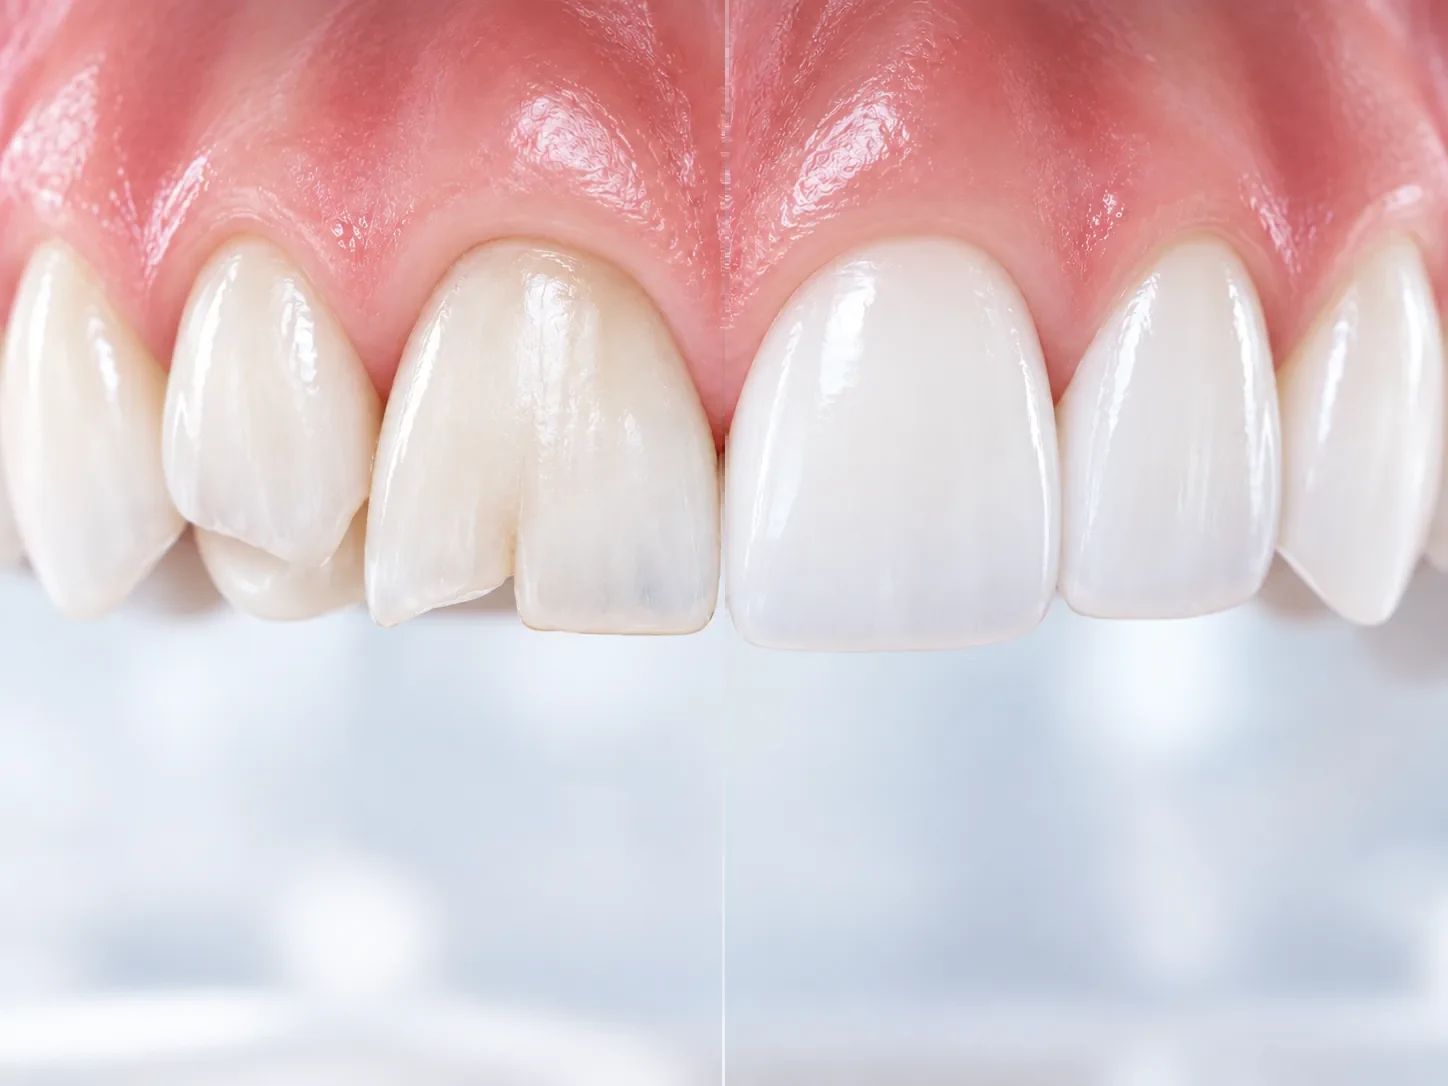
When the tooth tip is cracked or worn
When part of a tooth is damaged and shape improvement is needed

When front teeth alignment is uneven
Cases where one wants to aesthetically improve the alignment or angle of teeth
Veneer Treatment Cases

Before 
After Front teeth with mild protrusion

Before 
After When There Is a Gap Between Front teeth

Before 
After When a tooth is partially broken

Before 
After Other cases
The before-and-after photos are actual treatment cases of the same patient. Treatment results and recovery vary from person to person, and side effects or complications may occur after treatment. Whether to proceed with treatment and which method to use are decided through accurate diagnosis and consultation.
Veneers vs All-Ceramic Crowns

Focused on the front surface of the tooth
No-prep or minimal reduction, decided by tooth condition
Improves color, shape and small size differences
Treatment Area
Tooth Reduction
Suitable For

Covers the entire tooth
Tooth reduction is needed for the crown
Restores the shape and function of damaged teeth
※ The actual treatment method and amount of tooth removal vary depending on the condition of the teeth.
Veneers Procedure Process
Veneers first assess the tooth condition and desired shape·color, then,
We fabricate prosthetics that fit each individual’s teeth and place them permanently.
01 Precision Diagnosis and Design
We confirm the current tooth status and desired outcome.
We examine the color, size, shape, and arrangement of teeth and plan a form that suits the face and smile.02 Tooth Preparation and Impression
We prepare the teeth where veneers will be attached within the necessary scope.
Afterwards, tooth impressions are taken for prosthesis fabrication.03 Veneers Fabrication
We create veneers customized to each individual's teeth.
Complete the prosthesis considering the tooth's color and shape, and harmony with surrounding teeth.04 Final Attachment and Confirmation
Attach completed veneers to teeth.
We check the shape and color of the teeth, the occlusion status, and finish through necessary adjustments.
Related Treatments
Frequently Asked Questions
Veneers is a treatment that reshapes the front surface of the teeth as needed and attaches a thin ceramic prosthesis to improve the color and shape of the teeth. Because the amount of reshaping and the treatment Procedure vary depending on tooth Status and the desired result, a plan is made after first Confirmation of oral Status.
The cost of veneers at New York Yonsei Dental Clinic starts at 700,000 KRW per tooth, exclusive of Value‑added tax. The total cost may vary depending on the number of teeth, tooth condition, and treatment scope; the exact price will be provided after consultation and diagnosis.
The amount of tooth preparation varies depending on the current shape and alignment of the teeth and the desired color and form. The front surface of the tooth is prepared only When Necessary, and the amount of preparation may vary depending on the tooth Status. Before treatment, we provide a thorough Explanation of the expected amount of reduction and possible treatment Procedures.
If the teeth have been reshaped, they cannot be returned to their original Status. Even if Veneers are removed, Recovery of the reshaped teeth as they were is not possible, so a decision is made after Confirmation Together of the amount of reduction before treatment and whether improvement is possible with other Procedures such as Teeth Whitening.
New York Yonsei Dental Clinic uses e.max ceramic. It is fabricated considering colors and shapes that harmonize with natural teeth, and a treatment plan is devised according to the tooth condition and desired outcome.
If improving tooth color is the Purpose, Teeth Whitening may be considered first. Teeth Whitening is a Procedure that brightens the color of natural teeth without trimming the teeth. When the shape or alignment of teeth must also be improved, other treatments such as Veneers may be suitable, so we Guide the Procedure according to teeth Status and the desired result.
Gaps between the Front teeth can be improved with Veneers in some cases. However, the size of the gap, tooth alignment, and the size and shape of the teeth must be considered Together. Depending on the case, orthodontics or another treatment may be more suitable, so the treatment Procedure is decided after checking the oral Status.
Even when teeth alignment is uneven, Veneers may be considered depending on Status. However, if the alignment problem is significant, reviewing orthodontics first rather than trimming the teeth to match the shape may be more appropriate. Considering teeth Status and the desired result Together, we Guide a suitable treatment Procedure.
If you have a habit of grinding or clenching your teeth, excessive force may be applied to the Veneers, increasing the risk of cracking or coming off. If you have such a habit, occlusal Status is first checked, and Together with whether treatment is possible, We are reviewing. the need for protective devices such as a mouthguard.
The number of Veneers needed varies depending on the range of teeth you wish to improve and the color, shape, alignment, and current tooth Status. The treatment range is planned considering the range of teeth visible when smiling and harmony with the surrounding teeth, and the exact number and total Cost are provided after consultation and Diagnosis.
In general, you visit twice in total: the day teeth are prepared and impressions are taken, and the day the completed Veneers are bonded. Production time varies depending on the number of teeth and the case, and generally takes about 1~2 weeks.
While Veneers are being made, a Temporary prosthesis may be Use depending on tooth Status and treatment plan. When the completed Veneers are ready, they are attached to the teeth, and color, shape, and bite Status, etc. are Confirmed.
If Veneers are fractured or have come off, whether to repair or remake them is decided after Confirmation of the Degree of damage and the Cause. Excessive occlusal force or teeth grinding may be the Cause, so rather than only replacing the prosthesis, Evaluating them together the Cause of the damage as well is important.
Even after attaching Veneers, natural teeth and Gums must be managed consistently. It is advisable to confirm the bonding area and Gums Status through regular checkups, and it is advisable to avoid the habit of Directly biting or tearing hard foods with Front teeth. If you have a habit of grinding or clenching teeth, additional management may be needed.
There are no materials you need to prepare Separate. At the first visit, tooth and Gums Status are Confirmation through Panoramic X-ray and oral examination, etc., and a treatment plan is Guide according to the desired direction of improvement.
New York Yonsei Dental Clinic operates on a Reservation system. Please make a Reservation before your visit for smooth treatment.
· Phone: 02-558-2829
· KakaoTalk: search ‘New York Yonsei Dental Clinic’